While currently in Beta, variables offer a number of features that promise to dramatically improve both the design and development experience.
At Rangle, we often use Tokens Studio to manage brands and theming in our design systems, and we wanted to see how the new variables fit in. In this article, we will walk through the advantages of variables, the limitations, and how you can integrate them into your workflow today.
We used Radius Booster demo tokens to create screenshots and examples for this article. Radius is an ecosystem of resources needed to accelerate design systems, and Radius Booster is a practical demonstration of how to use design contexts as code.
What are the advantages of variables?
If you already use Tokens Studio, you may be wondering why variables are worth considering. While variables are currently limited, they also have some important advantages.
- They are native to Figma and don’t require a plugin to work. Plugins can be slow and tedious to use, especially since you can only run one plugin at a time.
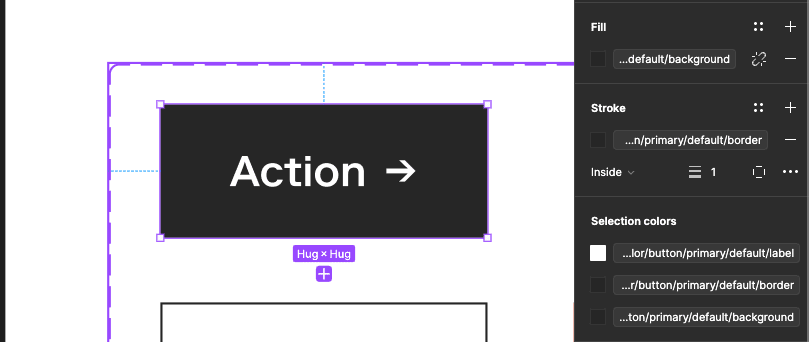
- In contrast, you can see variables in the inspect window directly, so it’s always obvious which properties are using variables and what their values are (even if they are referencing other variables). For example, the colors in the button shown below are all controlled by variables and indicated by a pill-shaped box around each of the values.
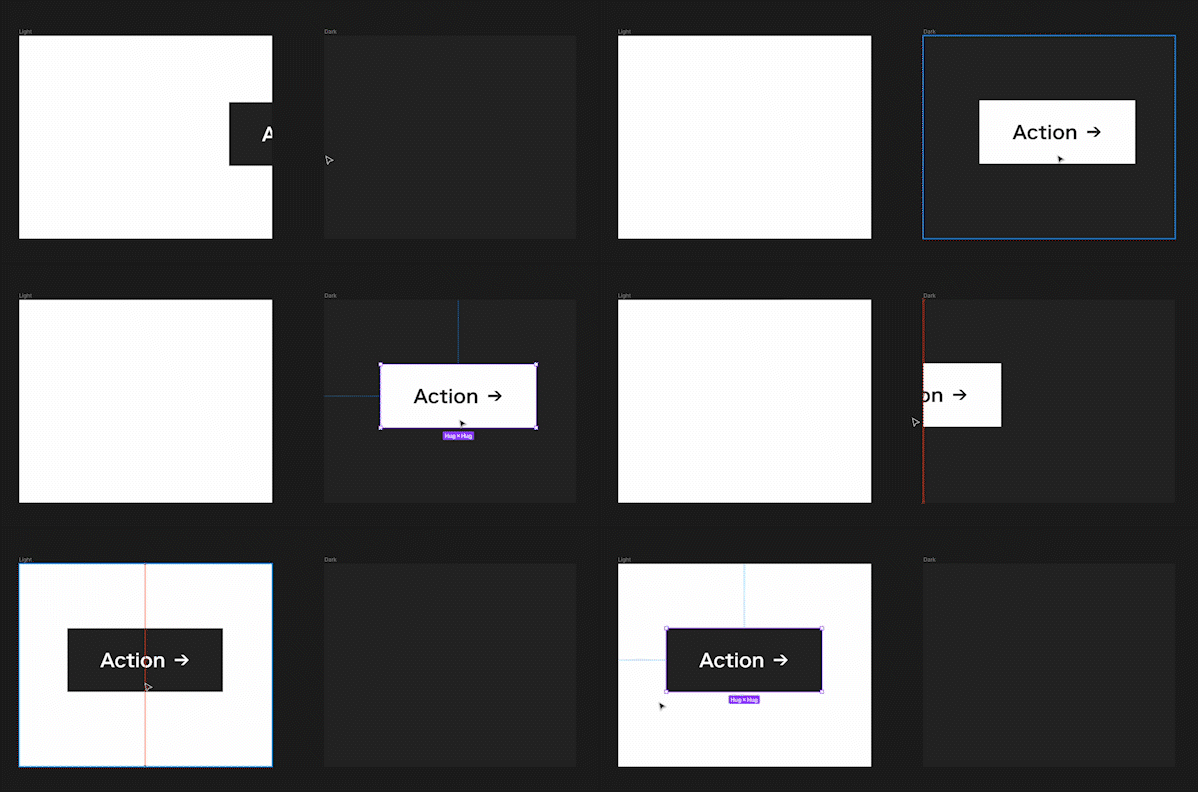
- You can also drag-and-drop elements into frames or sections with variables applied and they will automatically inherit the relevant styles. This makes visualizing changes, as well as creating and maintaining documentation, significantly easier.
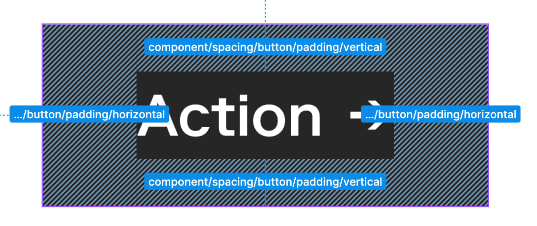
You can also see the variables directly in the canvas when inspecting elements in Dev Mode (another really exciting new feature announced at Config 2023 - you can read more about it here).
- Dev Mode reduces the need for token annotations in dev hand-off documentation since devs can directly inspect elements and see exactly which variables to use and where.
Another feature which is really exciting is the use of variables in prototypes. Variables allow significantly more complex behaviour with much less manual work. They enable designers to create interactive designs and experiment in a way that would previously only be possible after actually building the application.
- A working version of the game Flappy Bird created entirely in Figma using variables recently made headlines.
- Here's Figma’s documentation on Prototyping with Variables.
I highly recommend watching the keynote presentation from Figma Config 2023 - it goes through all of the new features and does a great job of explaining their benefits.
Where do variables fall short?
Even though variables have some great advantages over tokens, they are somewhat limited in their current state. They are missing core features that Tokens Studio currently offers, like typography and asset tokens, as well as things like stroke width, effect colors, and layer opacities. (See Tokens Studio's official documentation for a list of what’s missing.)
Besides the missing variables, the UI also has a number of limitations:
- There’s no way to drag and drop between collections (there’s also no move option when editing a token).
- There is no interface to toggle layers on and off like in Tokens Studio, which makes it harder to tell at a glance if references are configured correctly.
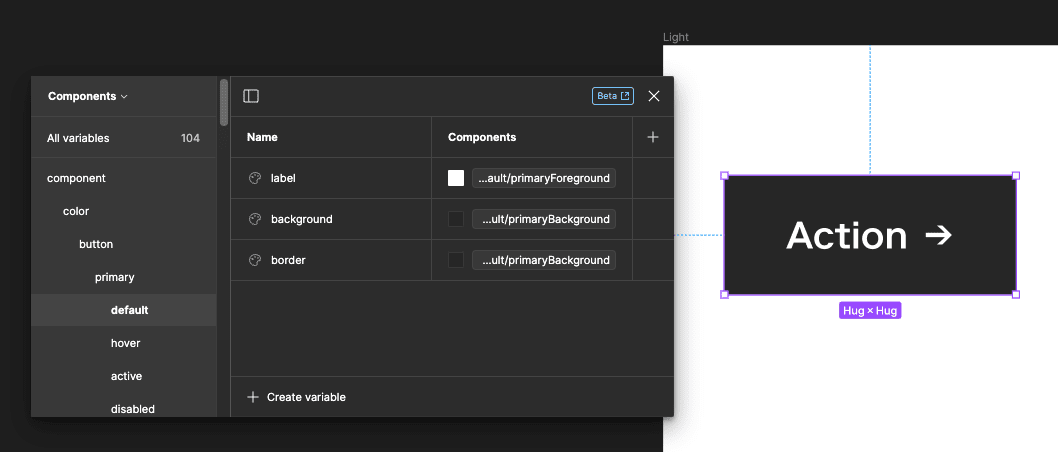
- When looking at a variable that references a themed variable (eg light and dark modes), it doesn’t necessarily reflect the currently active state. You can refresh the state by switching to another collection and back, which does then reflect the accurate values, like with the light and dark mode colors for the button component below:
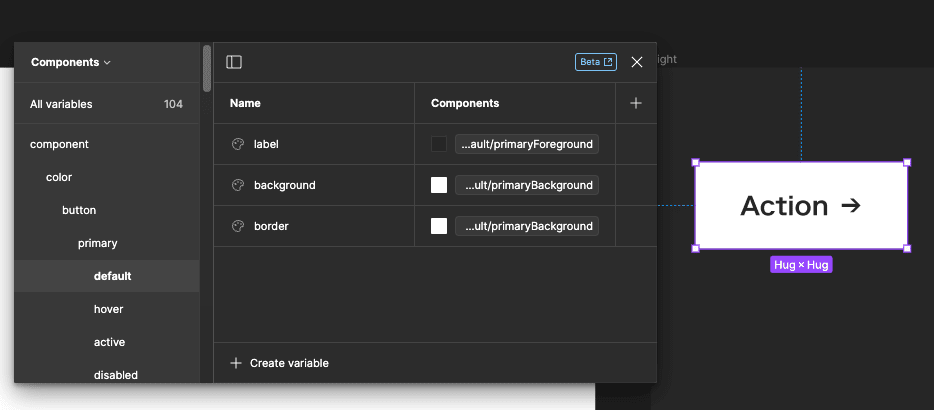
- The full names of tokens are often not fully visible making it difficult to identify them (especially on larger design systems).
- The raw values of variables are not visible in selection menus making it harder to verify they are correct at a glance.
- Selection menus don’t have an option to collapse sections making them harder to navigate.
Figma has plans to improve variables (along with all of their new features) in the near future - you can keep an eye on what’s coming next here).
A relevant quote from Figma’s Deep Dive video that stands out is:
That’s really what we want to allow variables to do. It's to allow you to bind to literally anywhere inside of Figma that you want to control with a variable.”
Jason Miller, Product Manger, Design Systems, Figma
Figma variables will really come into their own in the coming months, but in the meantime it might be a good idea to wait before switching entirely to variables. Thankfully, Tokens Studio has recently released features that allow it to work alongside variables. You can continue to use Tokens Studio as your source of truth, taking advantage of its more developed UI and larger token-set, while also getting all the benefits of variables. We’ll walk you through using Tokens Studio with variables in the next section.
How to create variables from your existing tokens
If you’re already using Tokens Studio, the thought of manually recreating your entire token structure probably seems pretty daunting. Thankfully, a recent Tokens Studio update includes a feature to create variables automatically from your existing tokens!
We’ll walk through the process, but I recommend also checking out their official documentation, as well as an official video showing this process.
In order to create variables from tokens you first need to have Themes set up in Tokens Studio. You can create (and edit) themes by clicking on the "Theme" drop-down and then "Manage themes".
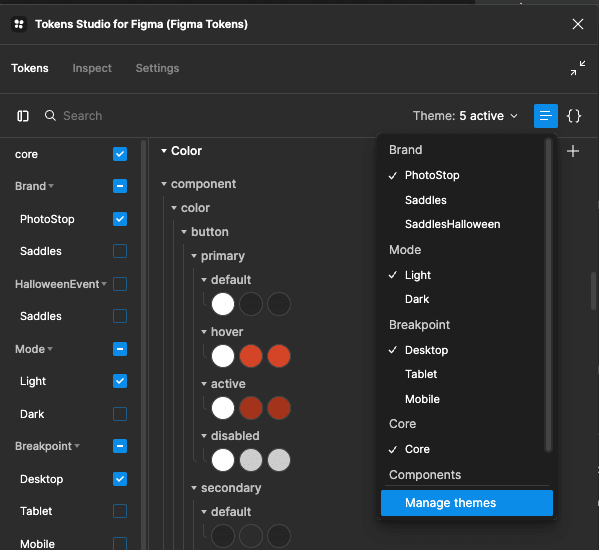
Variable sets will be created matching your theme structure, so make sure your themes are organized correctly. In most cases you’ll want to make sure that every collection has its own theme containing just that set. In our case we have themes for our Core, Component, Brand, Mode, and Breakpoint token sets.
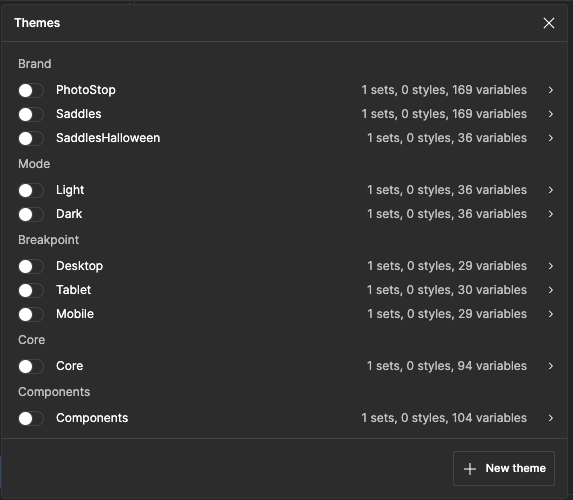
Make sure each one only has its relevant token sets enabled. Having multiple sets enabled in a theme will cause duplicates to be created when generating the variables.
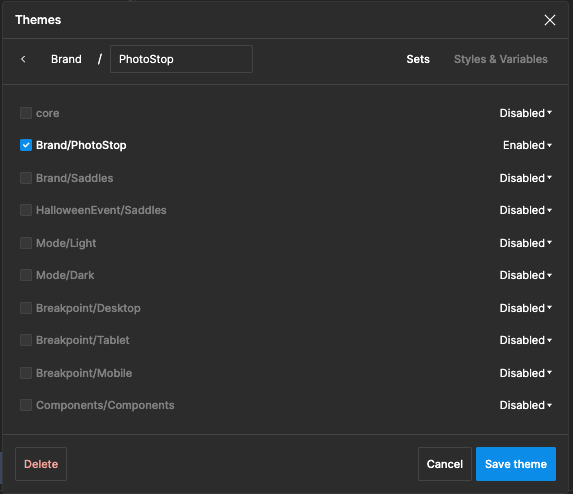
Under "Styles & Variables", click "Create Variables". This will automatically create variables replicating your existing tokens, including token references (preserving any existing theming).
Only variables that are currently supported by Figma will be translated during this process, so there may be some gaps (eg. typography, as mentioned earlier).
Now, your variables should be created. You can see them by opening the "Local variables" menu (visible on the right with nothing selected). Each of your variable collections (equivalent to token sets) are created according to your themes.
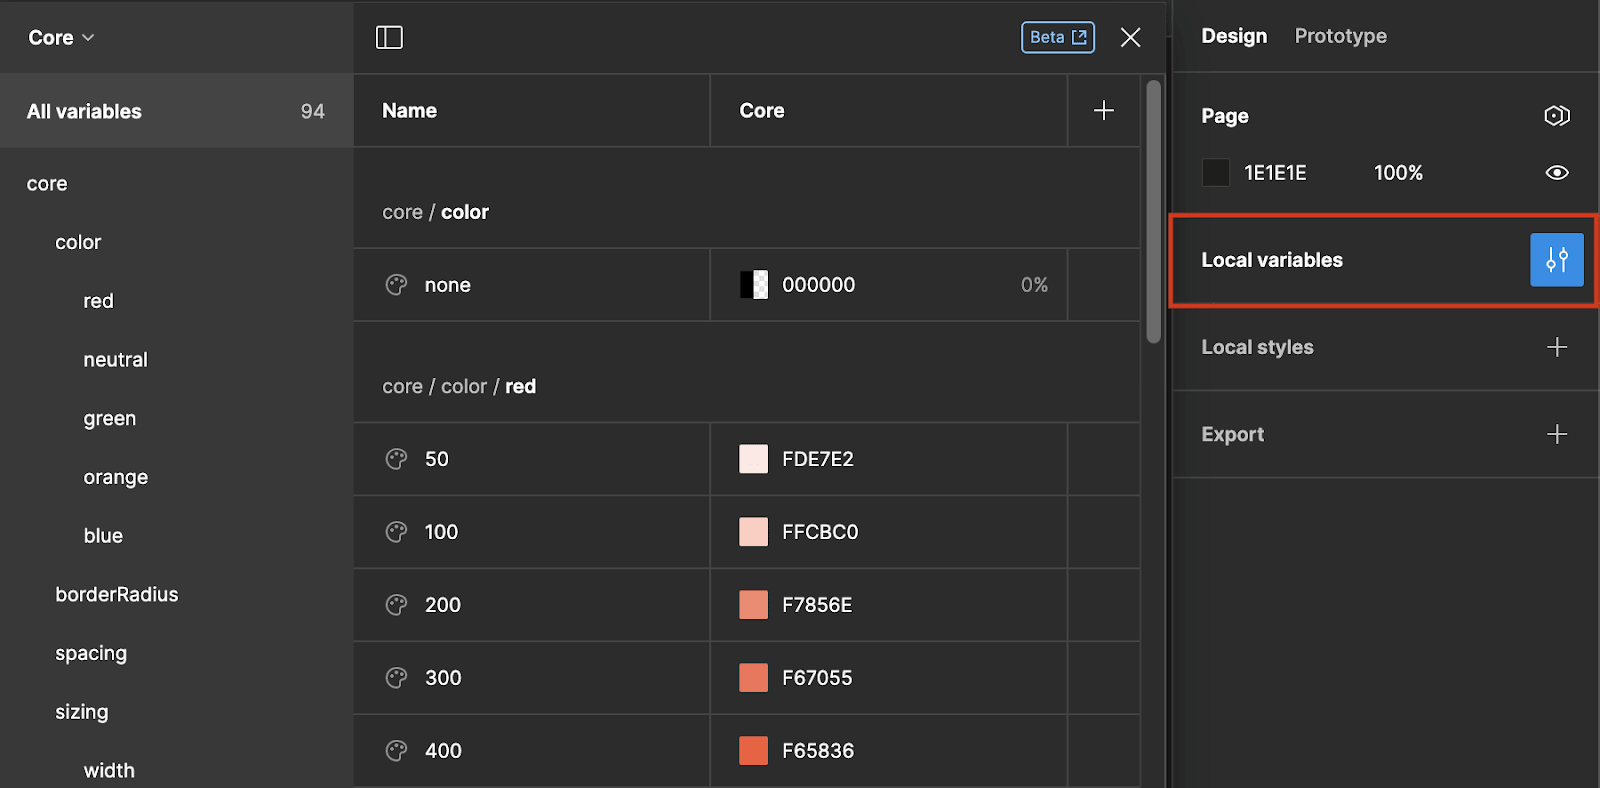
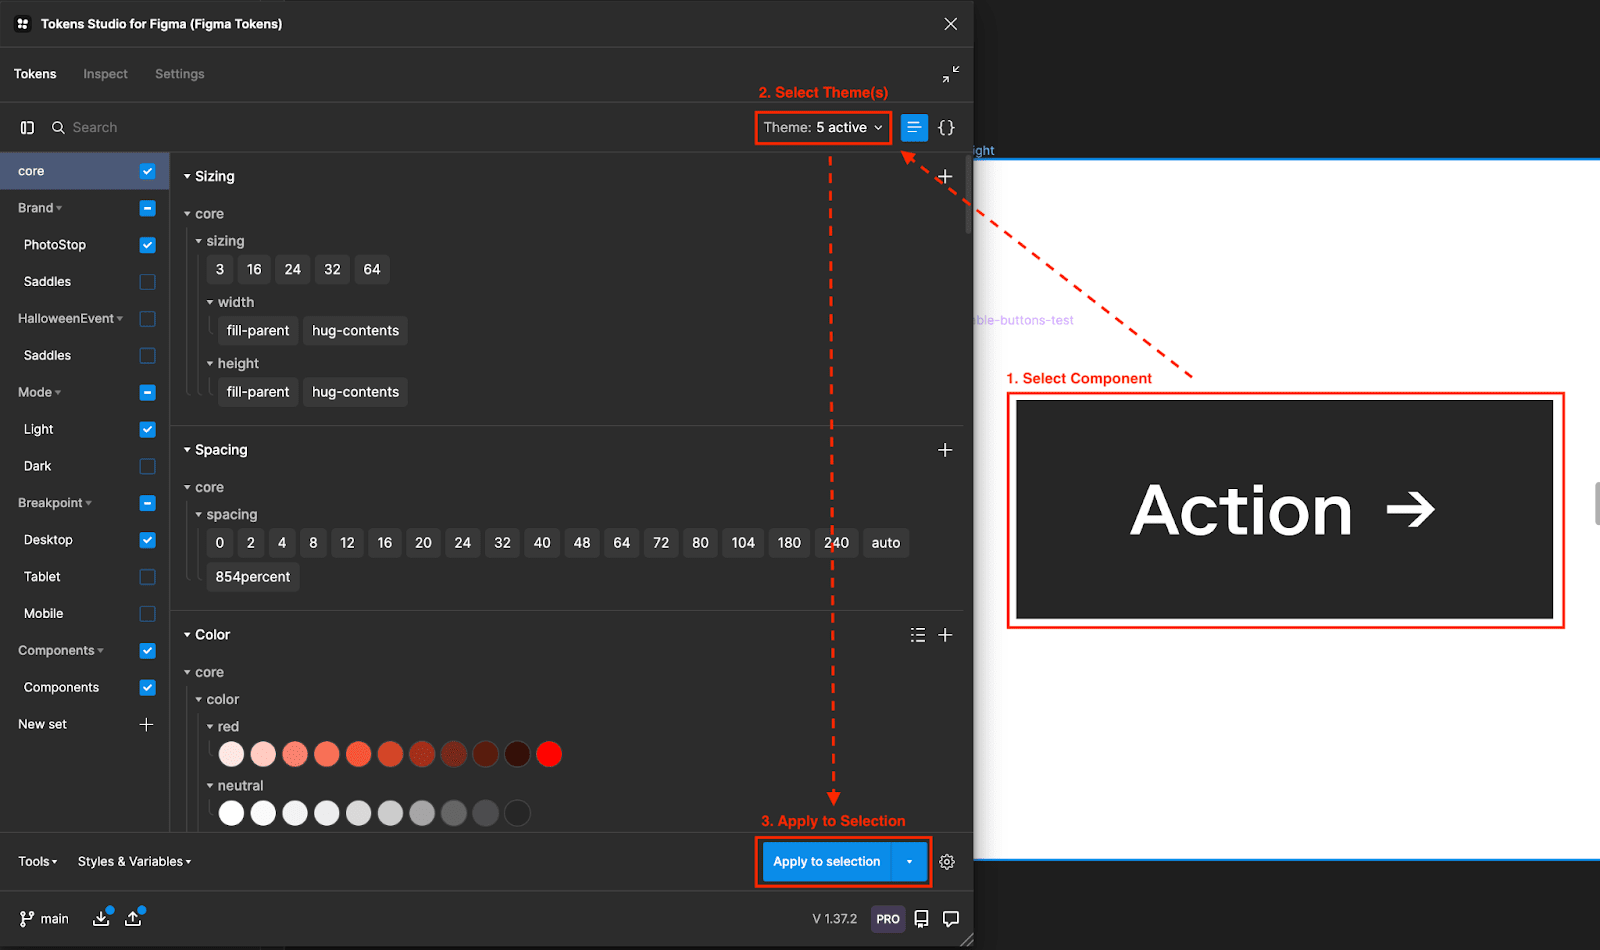
This is great, but you’ll probably notice that your components still have the old tokens applied. Thankfully, Tokens Studio can also now replace your injected tokens with variables automatically. In order to update your components to use the new variables:
- Select your component;
- Select the themes we created earlier that you want your specific component(s) to have; and
- Ensure "Update styles" is enabled then click "Apply to Selection".
Tokens Studio will search for any variables matching existing tokens and replace them.
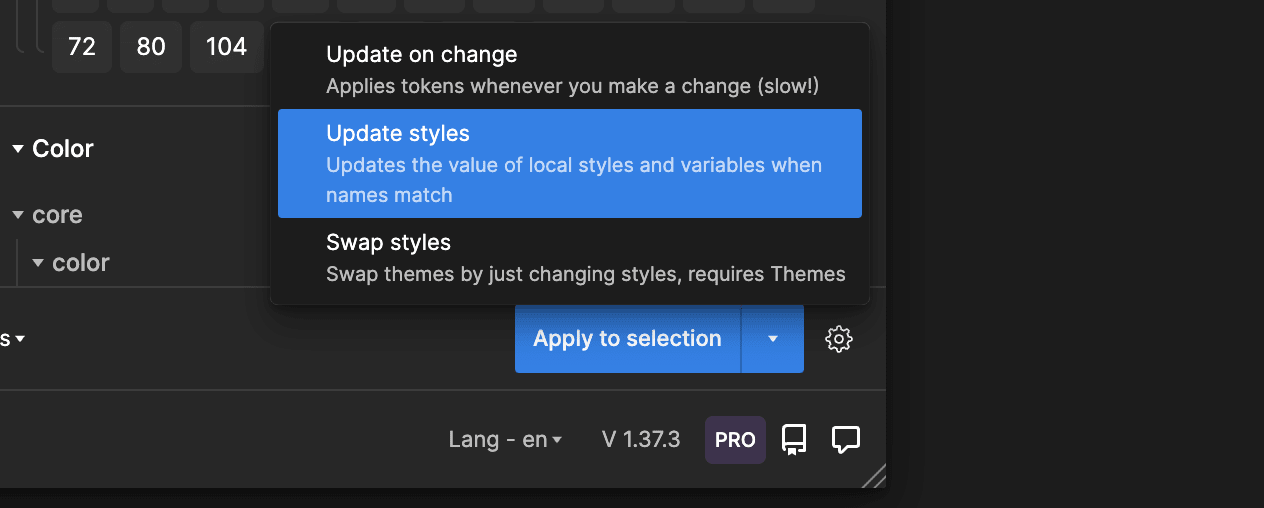
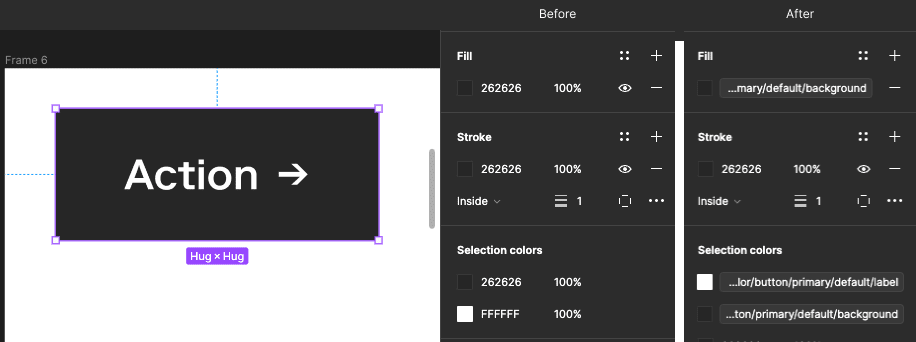
Note: there was a bug translating stroke color at the time of writing this article (which is why the stroke didn’t update in this example). This has since been fixed (see patch notes).
It may seem tedious to repeat this process across dozens of variants for each component, but switching to variables actually reduces the total number of variants you'll need to use. We’re then able to cover all the same use cases as before with far fewer variants.
For example, we were able to reduce the number of variants we had for our button component from 48 variants (covering light and dark mode, breakpoint, priority, and state) to 8 variants, since our light & dark modes and breakpoints were all covered by variables.
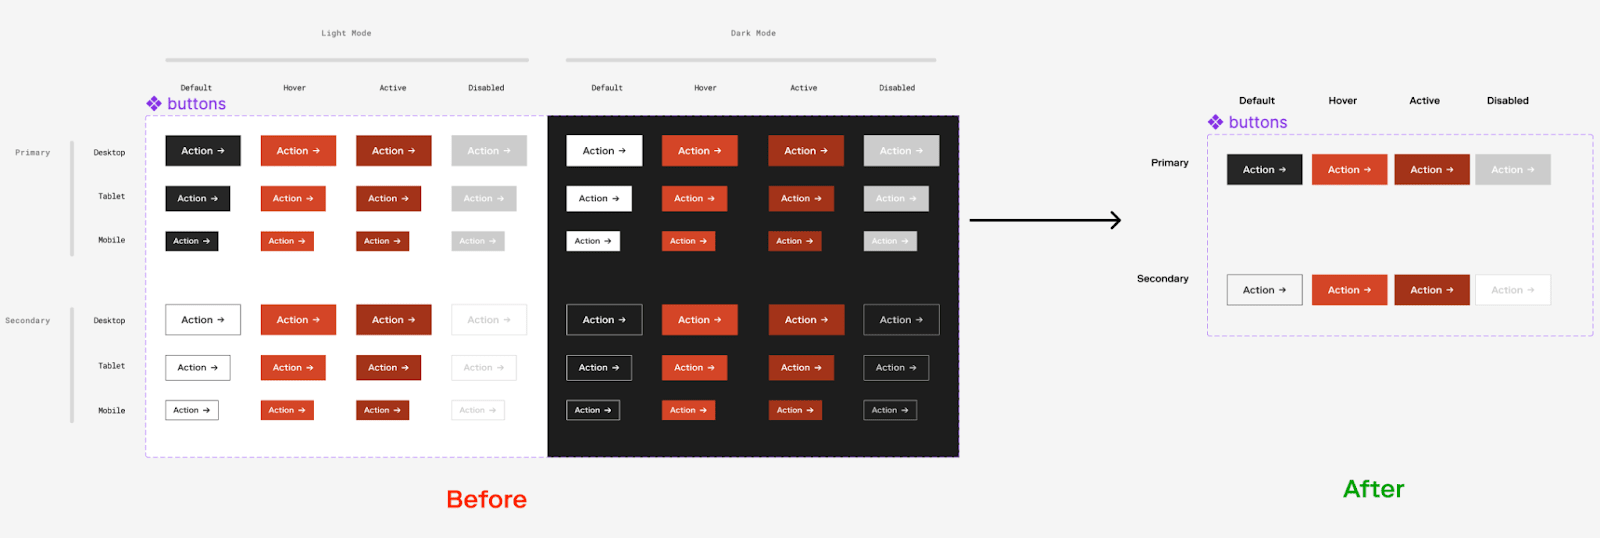
To create the same documentation as before showcasing all of the possible states, you can simply set up multiple frames with the appropriate variables applied and then just drag and drop your components into them.
To do this, first create frames with the variables applied that you want to display (set in the "Layer" panel on the right).

Then you can simply drag and drop your components with variables into the new frames and they will adopt the styles automatically.
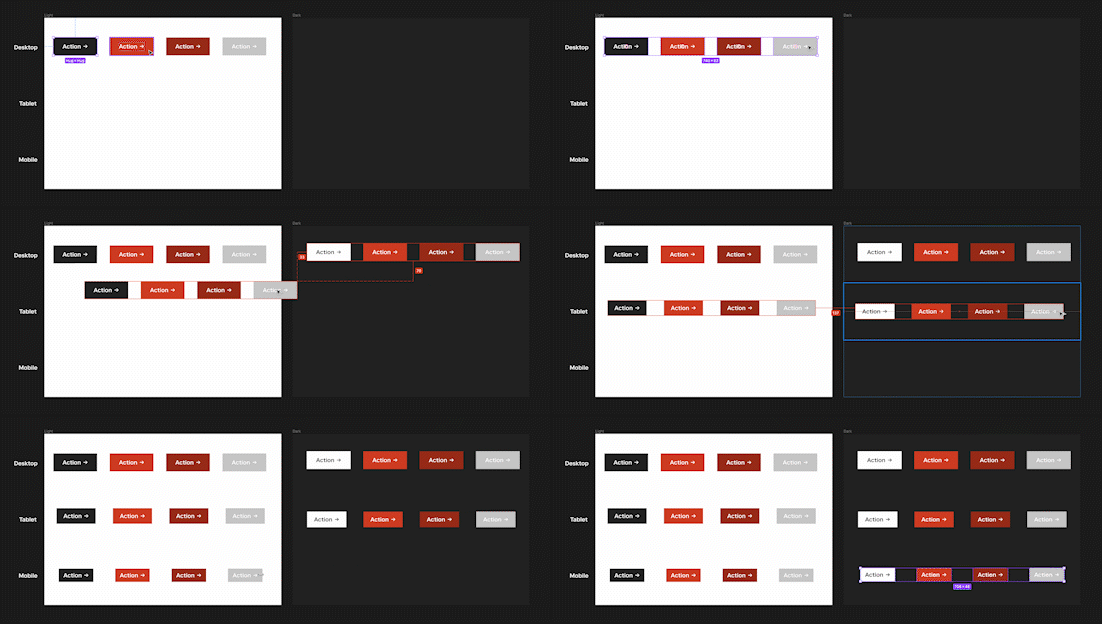
This video snippet from Config 2023 walks through the process of using variables to reduce the number of variants (among other things).
Keeping tokens and variables in sync
Okay, so you have your variables set up and they are connected to tokens. How do you keep them both up to date?
Editing existing tokens: When you edit an existing token that’s already linked to a variable, the corresponding variable will update automatically; no extra actions need to be taken.
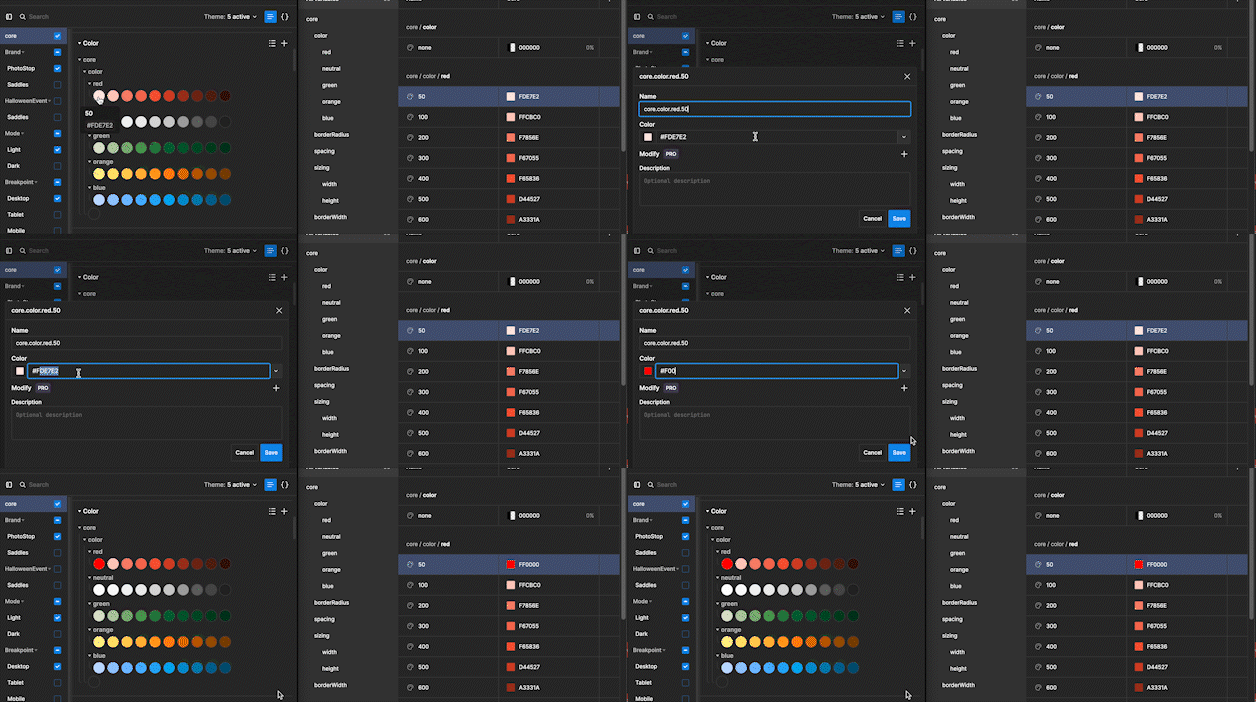
Adding or removing tokens: When you add or remove a token, it doesn’t sync automatically with your variables and this requires an additional step.
- To create a new token, first create it normally in Tokens Studio, then click "Create variables" under "Styles & Variables". Any new tokens should appear as variables in their respective collections.
- To remove an existing token, delete it as you normally would in Tokens Studio. Then click "Sync variables" under "Styles & Variables". This will open a context menu with two options - make sure "Remove variables without connection" is selected and click "Yes". This will also remove any variables that aren't connected to any tokens (including those that are only connected to what you’re deleting).
Renaming tokens: You can also rename tokens (and their corresponding variables) using the "Sync variables" option under "Styles & Variables". Ensure you have the "Rename variables" option checked and it will automatically rename any variables that are connected to tokens which are being renamed.
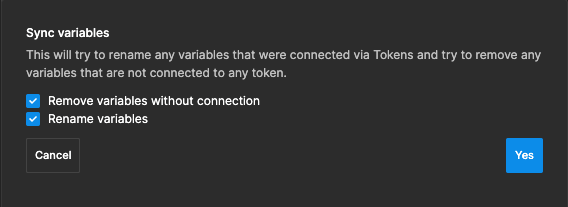
It’s a good idea to sync variables often, with both options selected, to ensure that your tokens and variables are always up-to-date
The future
Do we plan to transition completely to variables once they are more developed?
Eventually, yes. Not managing two separate interfaces, and not needing to use a third party plugin is a no-brainer assuming the functionality and UX are up to our expectations.
But besides the limitations we mentioned earlier in the article, we'd also want to ensure that there is a good way to backup variables to an external source so they can be used in development. This is another area where Tokens Studio currently has an edge, with their GitHub integration (along with GitLab, Azure, and a few others).
Thankfully, variables and tokens share similar structures, so once that feature is added, it won’t be hard to update our codebase to accept the new variable structure. It’s even possible to write a plugin today which can sync your variables with GitHub. However, given the feature is still in beta (and that Tokens Studio still bridges that gap), we’re planning to wait for some more official support. Chances are, it will be added as a core feature in the near future.
Will Tokens Studio continue to improve?
For the time being, yes. Figma has been very quick to add new features to allow Tokens Studio to work with variables and are continuing to improve their support.
They are also working on new quality of life features which may make Tokens Studio the preferred interface, notwithstanding upcoming improvements to variables. One example is the new Resolvers Interface - a visual drag-and-drop interface for creating and editing tokens that looks very promising as an alternative to the current table-based UI.
What do the creators of Tokens Studio think about variables?
To quote their recent release documentation:
Overall, we’re quite excited by these changes as it means the plugin does not have to do the heavy lifting anymore for a lot of users, and instead can transition into a role of a helpful assistant when it comes to managing design tokens and connecting them to code.”
So we wouldn’t count Tokens Studio out just yet. They do a great job of bridging the feature gap in the short term, and the management of tokens (and variables) are becoming increasingly intuitive, so they will likely continue to be a valuable resource well into the future.
To learn more about design systems, check out our design systems hub and sign up for our newsletter to be the first to hear about new content.


