In Part 1 of this series, “Using Angular to supercharge developer experience,” we discussed how Angular schematics could help enhance developer experience and enable smooth design system adoption. In this article, we will take a deeper dive and focus on the technical details around Angular schematics.
In a nutshell, a schematic describes how to transform a project's file system step-by-step. You can instruct the schematic to add, modify, or remove multiple files in an existing codebase. You can also instruct the schematic to perform other tasks, such as bootstrapping a project or installing node packages as dependencies.
I use the word “describe” here because the schematic doesn’t apply changes directly to the file system; instead, the schematic records change to a virtual representation of the file system called Tree. Those changes will only be applied to the actual file system if the changes are valid. For instance, you may instruct the schematic to create a “config.js” file in a config folder. When you run this schematic in the terminal, the schematic throws an error if the file already exists or the “config” folder doesn’t exist.
This mechanism ensures the changes you want to make will not conflict with the existing file system; errors are thrown instead of failing silently. Recording changes in the memory also make it possible to run the schematic commands in a dry-run mode. That allows developers to review changes before applying them to the file system.
Angular schematics can generate files from templates. Below is a typical template used to generate an Angular component. Dynamic data are injected between the <%= %> pair.
import { Component } from '@angular/core';

@Component({
  selector: '<%= name %>',
  templateUrl: './<%= name %>.component.html',
  styleUrls: ['./<%= name %>.component.scss']
})
export class <%= classify(name) %>Component {}
There are utility functions to manipulate files, so you don’t have to implement those logics. Some helper functions include:
- String manipulation: transform a string to formats such as underscore, upper camel case, and more. The classify method used in the template comes from Angular schematics util.
- Work with modules: helper function that adds a new declaration in an existing NgModule

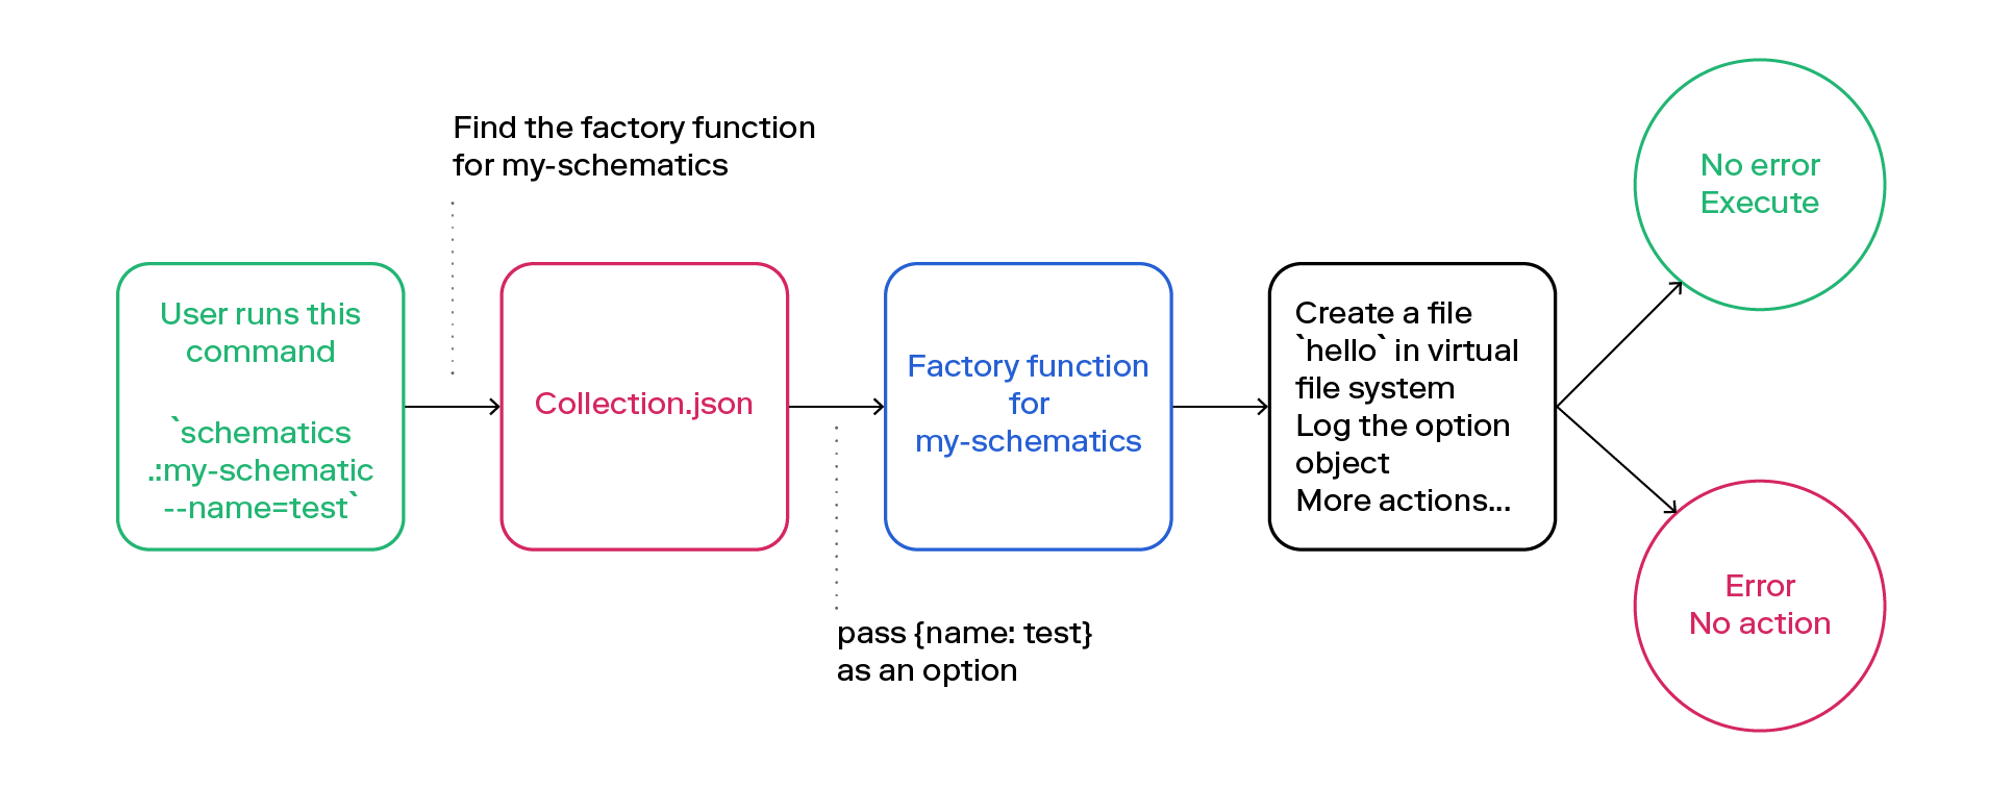
When users run the ng g ds-schematics:component command, the Angular CLI will execute this component function and pass command parameters as options to the component function.
This sample component function generates a checkbox component based on the custom templates provided from the files folder.
import { strings, normalize } from '@angular-devkit/core';
import { apply, chain, externalSchematic, MergeStrategy, mergeWith, move, Rule, SchematicContext, template, Tree, url } from '@angular-devkit/schematics';


export function component(options: any): Rule {
 return (tree: Tree, context: SchematicContext) => {
   // Create a template source from the template files in the `files` directory.
   // Pass in the options (such as name) to the template function to replace the placeholders with the values from the options.
   // Pass in the strings utility to the template function to convert strings to formats such as dasherize, classify, etc.
   const templateSource = apply(
     url(`./files`), [
     template({
       ...strings,
       ...options
     }),
     // Move the generated files to the designated path when the schematic is applied.
     move(normalize(options.path)),
   ],
   );
   // Chain multiple rules together and execute them one after the other.
   // First the `externalSchematic` method generates a component using the Angular CLI schematic.
   // Then the `mergeWith` method merges the files generated from the templateSource with the files generated from the Angular CLI schematic.
   return chain([
     // Rule 1: create a component using Angular CLI
     externalSchematic('@schematics/angular', 'component', {
       ...options,
       style: 'scss',
       skipImport: false,
     }),
     // Rule 2: override the Angular CLI generated component using my custom template
     mergeWith(templateSource, MergeStrategy.Overwrite),
   ]);
 }
}
Angular schematics encourage composition, so you can pick and choose a local or external schematic to reuse in your schematic! In this example, I generate a component using Angular CLI and override the default component template with my custom template.
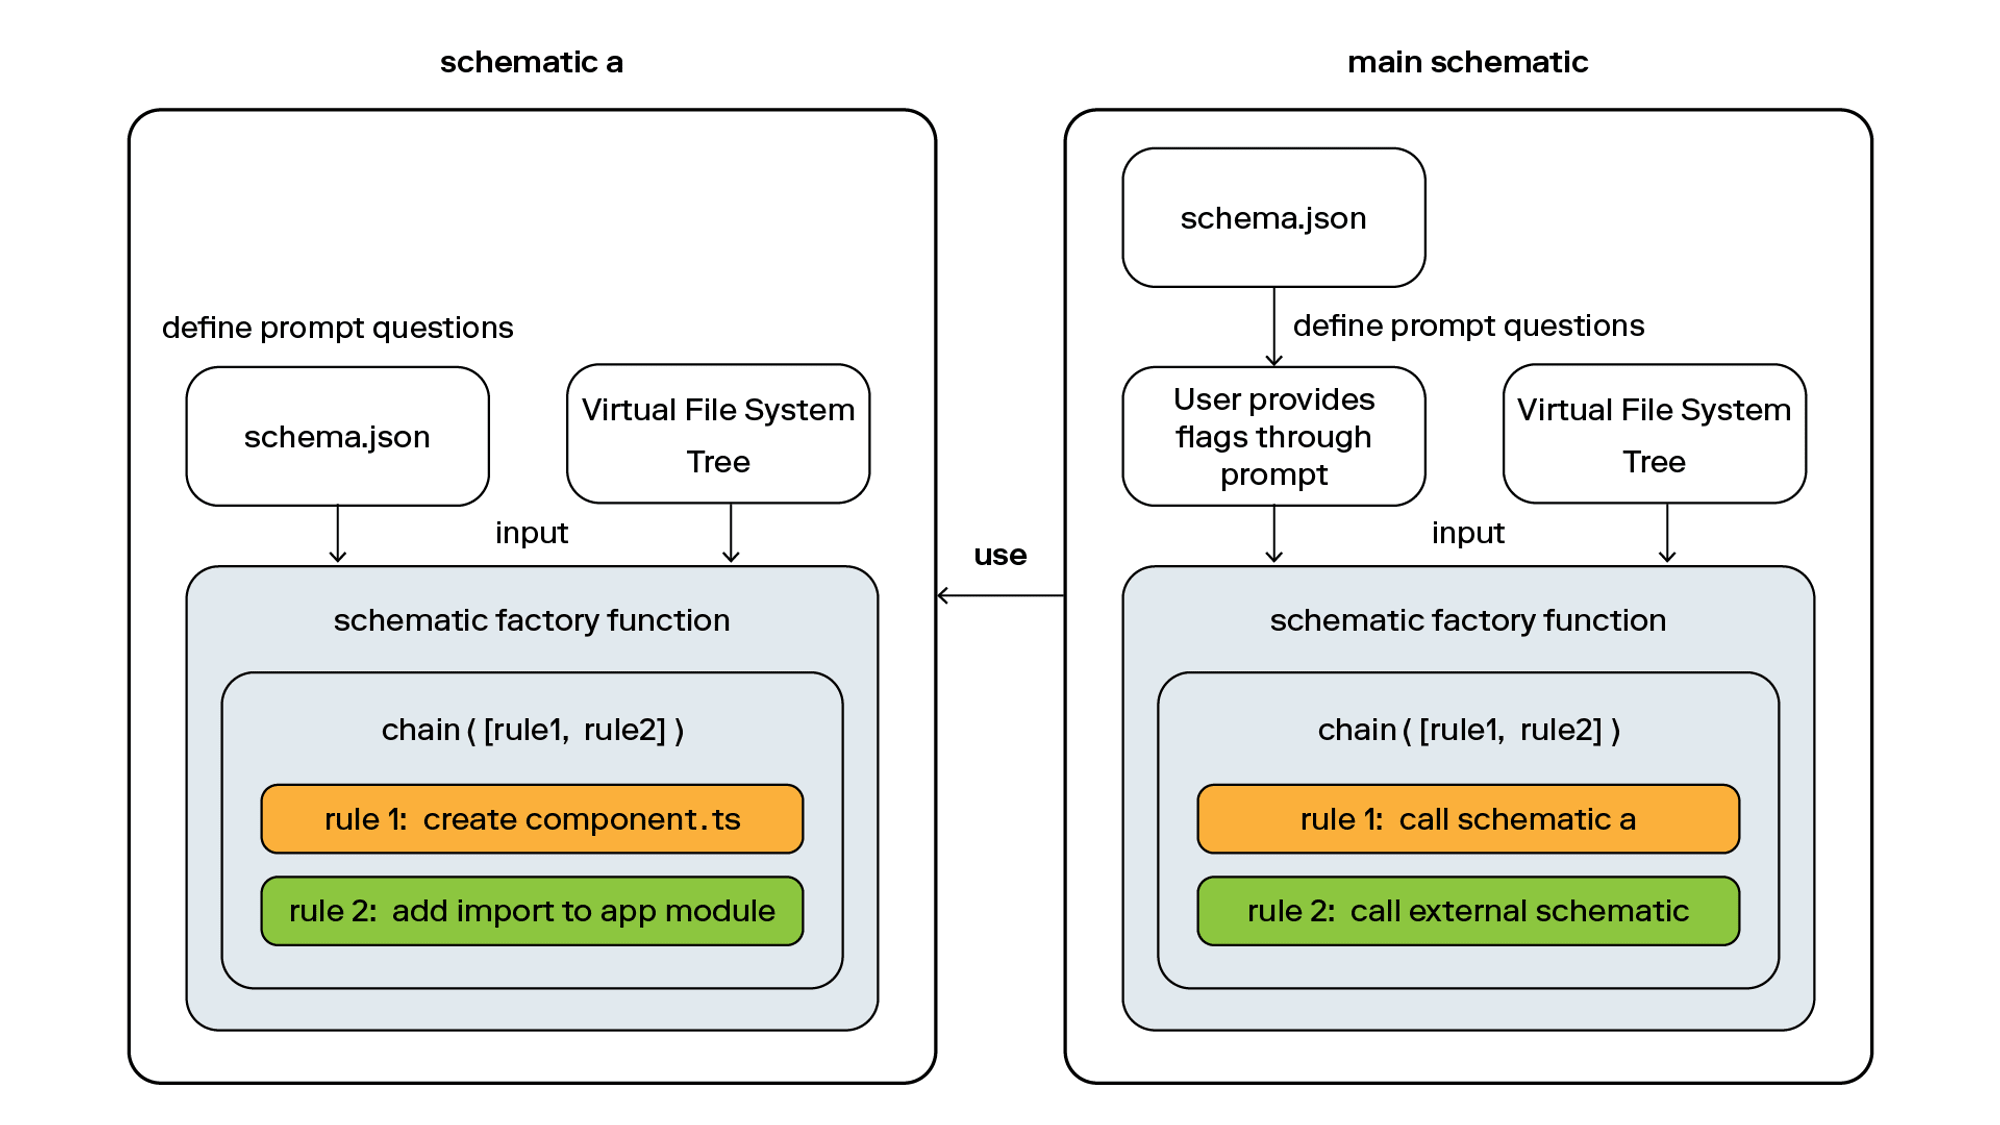
Put everything together, and this is what the code above does.
Angular Schematic defines prompt questions in the schema.json file. When the user runs ng generate my-component --name=checkbox, schematics extract the flag name=checkbox and pass those data (options) to the factory function component. We can use the value checkbox in the component function by referencing options.name.
Then, schematics call rules to apply changes to the staging area of the virtual file system. What are rules, you may ask? Rules are small steps responsible for a specific aspect of the generation process, and they can be combined to create a complex schematic. In the code example above, two rules are called in the component schematic:
- Rule 1: externalSchematic is a method from Angular Schematics that allows us to call external schematics by providing custom options. Here, we call the Angular CLI component schematic to create a component using the Angular default template.
- Rule 2: our custom code that applies template changes to the Angular CLI default component.
At last, if all those changes have no errors, the schematics apply changes to the file system.
In Angular Schematics, the factory function acts as a builder that creates and returns a new schematic, and the rules act as the building steps that define the behavior of the schematic. The diagram below shows the relationship between rules and schematics:

If you want to learn more about how to use Angular Schematics in practice, here is a demo repository where I show you how to:
- Create a custom standalone component for your Angular project.
- Create an ng add command that installs jest as a dependency and updates the npm script in package.json to use Jest for testing.
We love talking about Angular and all things related to web development. If you're curious about a specific topic, reach out to us and we'll be happy to chat.


