There are few things less appealing than forms but they're still one of the most direct ways for a user to dump a hunk of data into your server. To make the process of filling a form as painless as possible, one needs a good form system that handles common concerns such as:
- Handling field and form data
- Validation
- Submission
- Integration with the rest of our application
There are many form systems in React. The most common choices seem to be either going with vanilla React components and state, or using one of the many libraries that expose Higher Order Components (HOCs) that may or may not integrate with Redux.
Redux Form is one of those libraries, one that manages your form state in Redux. I haven't tried all other options so I'm not claiming this is the one true form tool, but I've tried vanilla React forms and custom in-house React form systems, and Redux Form has provided the nicest form-making experience of them all.
What We're Doing
We're going to make a form. In loose order, we'll be covering these topics using Redux Form v7:
- Hooking up Redux Form to our Redux store
- Splitting up data and presentational concerns into containers and components
- Making custom and reusable form components (text inputs, dropdowns, datepickers, radios, and checkboxes)
- Styling with Tachyons
- Using built-in action creators and selectors to make dynamic fields that depend on the values of other fields
- Real-time client side validation (both upon submission and per keystroke)
- Basic form submission
Requirements
- Node v6+
- npm/yarn
- Create-react-app
Setting Up Our Store
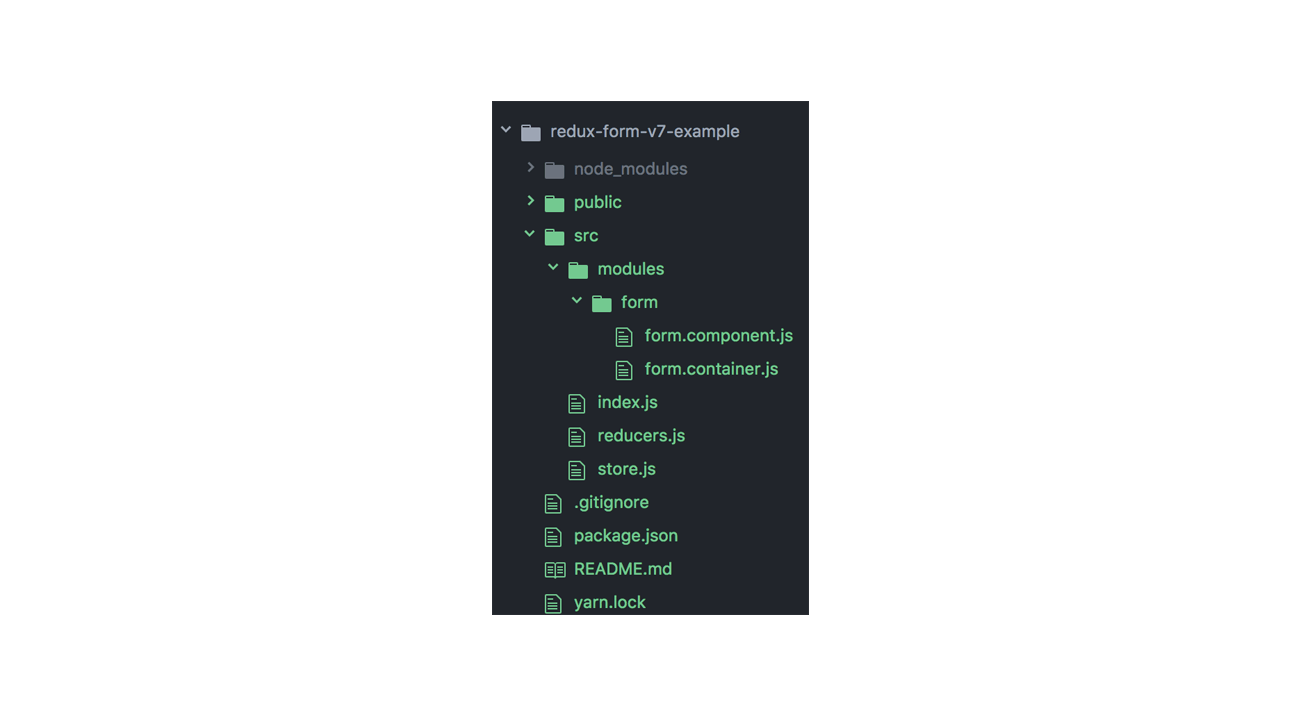
Use create-react-app to create a new react application and then structure the folders and files to follow this shape:
create-react-app redux-form-v7-example
Our entry point will be index.js. This is where we wrap our main component, FormContainer, with our Redux store, and render our app onto the page using ReactDOM.
Index.js
import React from "react";
import ReactDOM from "react-dom";
import { Provider } from "react-redux";

import FormContainer from "./modules/form/form.container";
import configureStore from "./store";

const store = configureStore();

ReactDOM.render(
  <Provider store={store}>
    <FormContainer />
  </Provider>,
  document.getElementById("root"),
);
The store.js file exports a function that configures a store. It's set up in such a way that we can easily plug in middleware and enhancers like Redux Devtools.
store.js
import { createStore, applyMiddleware, compose } from "redux";
import createReducer from "./reducers";

const composeEnhancers =
  typeof window === "object" &&
  (window.__REDUX_DEVTOOLS_EXTENSION_COMPOSE__
    ? window.__REDUX_DEVTOOLS_EXTENSION_COMPOSE__
    : compose);

export function configureStore() {
  const middlewares = [];
  const store = createStore(
    createReducer(),
    {},
    composeEnhancers(applyMiddleware(...middlewares)),
  );
  return store;
}

export default configureStore;
And the corresponding reducer.js file exports a function that combines all reducers into one. I like to keep my root reducer file separate from my store to keep things more modular.
reducers.js
import { combineReducers } from "redux";
import { reducer as formReducer } from "redux-form";

export default function createReducer(extraReducerObjects = {}) {
  return combineReducers({
    form: formReducer,
    ...extraReducerObjects,
  });
}
For the form.container.js and form.component.js files let's just make filler components for now, like this:
src/modules/form/form.container.js
import React, { Component } from "react";

class FormContainer extends Component {
  render() {
    return <div>what</div>;
  }
}

export default FormContainer;
Splitting Up Data and Presentational Concerns
It's common practice in React applications to separate concerns of data and presentation into containers and components. We're going to put all of the stuff that deals with data and state in the container, and all of the stuff that deals with how the form looks into the component. This will serve as a loose guide as to how we structure our components.
Separating our components in this way not only makes it easier to test but also easier to reason. If you want to change how something looks you change the component, and if you want to change how something works you change the container.
Wrapping Our Form Container with Redux Form's Higher Order Component
Let's start making our container, a normal React component that renders FormComponent and wraps it with Redux Form's reduxForm() helper. reduxForm() is a function that takes in a form configuration object and returns a HOC, a function that takes and returns a component.
The purpose of such wrapping in this case is to return the wrapped component with a bunch of helpers -- functions that can change the state of the form or give you information as to whether a form field was touched or validated, or which fields are registered -- passed through as props.
src/modules/form/form.container.js
import React from "react";
import { reduxForm } from "redux-form";

import FormComponent from "./form.component";

export const FormContainer = (props) => {
  return <FormComponent />;
};

const formConfiguration = {
  form: "my-very-own-form",
};

export default reduxForm(formConfiguration)(FormContainer);
If you place a console.log(props); right before the return in the container you can actually see these props for yourself:
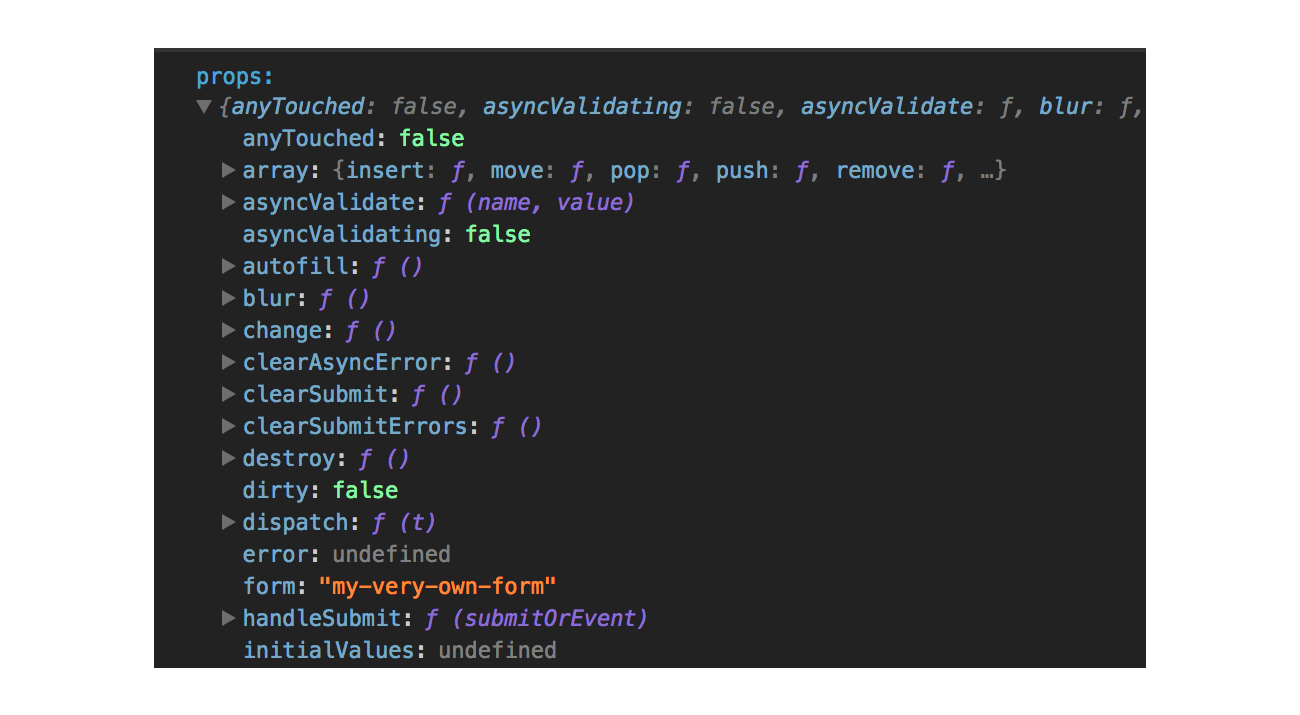
All of the above helpers act sort of like a master control for the form you wish to wrap by providing action creators to change the state of the form. Here's a comprehensive list from the documentation:
Let's use one of these props, handleSubmit(), a function that runs validation and invokes a function we define and pass in with all of the form values passed to it as a parameter. We'll pull out handleSubmit from the passed props with ES6 destructuring and define our own submit handler to be used with handleSubmit, and then pass the two props down to our form component:
src/modules/form/form.container.js:
import React from "react";
import { reduxForm } from "redux-form";
import FormComponent from "./form.component";
export const FormContainer = ({ handleSubmit }) => {
  const submitForm = (formValues) => {
    console.log("submitting Form: ", formValues);
  };
  return <FormComponent onSubmit={submitForm} handleSubmit={handleSubmit} />;
};
const formConfiguration = {
  form: "my-very-own-form",
};
export default reduxForm(formConfiguration)(FormContainer);
Redux Form's Field Component
Besides the reduxForm HOC provided by Redux Form, another big helper is the Field component. It's a normal component that represents a field in a form, but what makes it really unique is that each Field is individually connected to Redux state. If you've ever created forms with React then you should be familiar with the concept of controlled components.
HTML5 form tags like 'input' and 'textarea' often maintain their own state that gets updated upon user input. This leads to unnecessary complications when also handling React and Redux state because now data state has to be synced on three different levels, with no huge benefit. It's much easier to have the user input update a single source of truth (Redux) and have the inputs draw their state and value from that source. It makes for a more unidirectional flow that's easier to follow and debug. We can use Field as is like this (a name prop is required to set the key in the reducer):
src/modules/form/form.component.js
import React from "react";
import { Field } from "redux-form";

export const FormComponent = ({ handleSubmit, onSubmit }) => {
  return (
    <div>
      <h1>My Very own Form</h1>
      <form onSubmit={handleSubmit(onSubmit)}>
        <Field name="firstName" component="input" />
        <button type="submit">Submit</button>
      </form>
    </div>
  );
};

export default FormComponent;
Another neat feature of Field is that we can pass our own component into it via the component prop because Field is essentially a component that acts much like a HOC in that in can accept and return a new component. And similar to how reduxForm wrapped our container and passed in a lot of utility functions via props, Field does the same and passes a lot of utility helpers onto the component we pass in via the component prop.
By default we can pass in strings like 'input' that will render an input tag for us, but if we want more customization as to how our field will look or how it manages data and handles events, we need to pass in our own custom component.
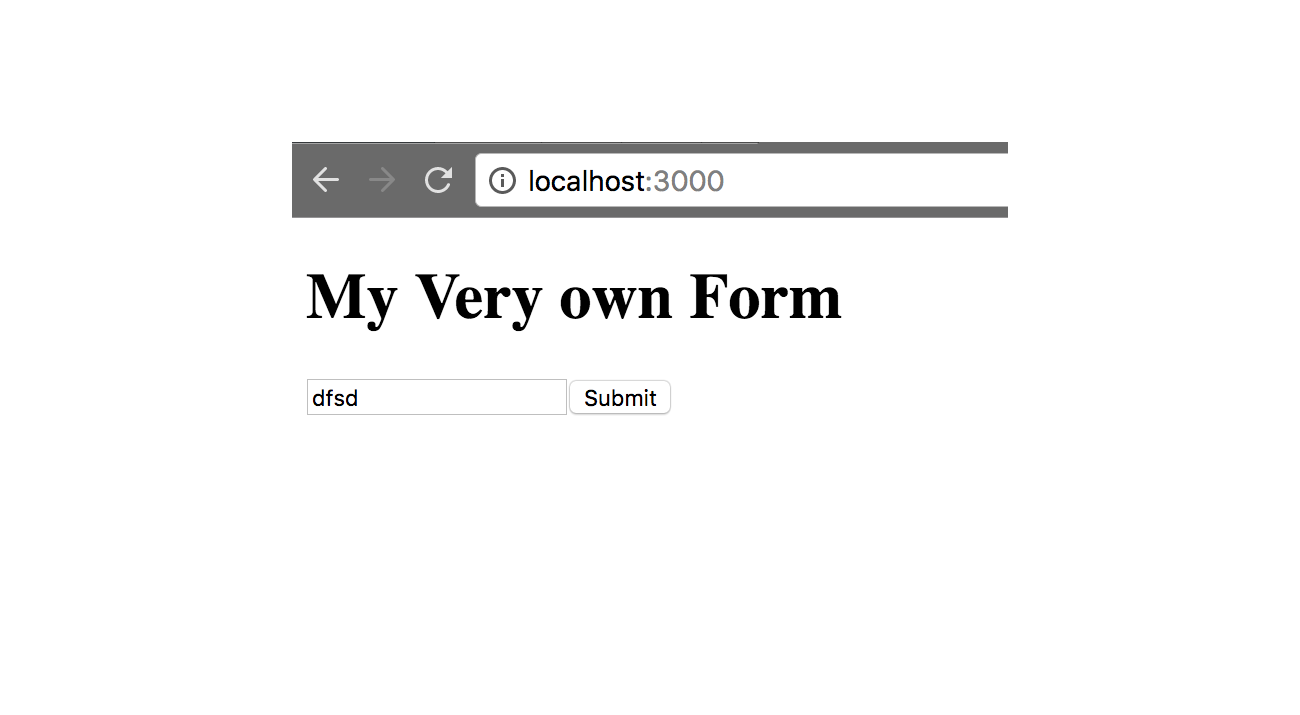
Here's how our form looks right now:
And look at all the cool data we got in Redux State! Each form and field is connected to the Redux Form reducer and provide information we can use in our own components.

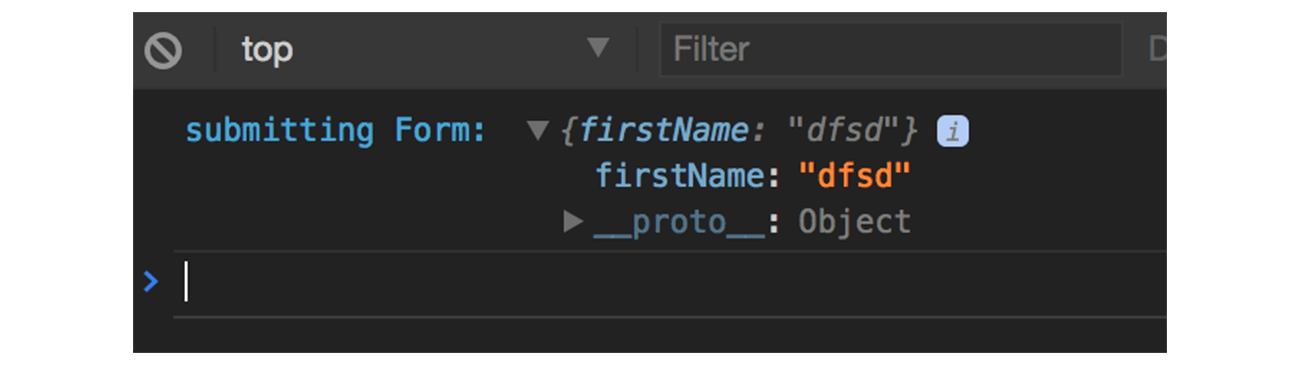
(a Redux DevTools chart of our Redux store split into its reducers) And when we click the submit button, it will invoke our submitForm method with the form data as we discussed:
Making a Custom Text Input Component
Let's create a text.js file in our new folder, components, which will return a component that receives props from Redux Form's Field component and renders an input tag.
src/modules/components/text.js
import React from "react";
export const Text = ({ label, input }) => {
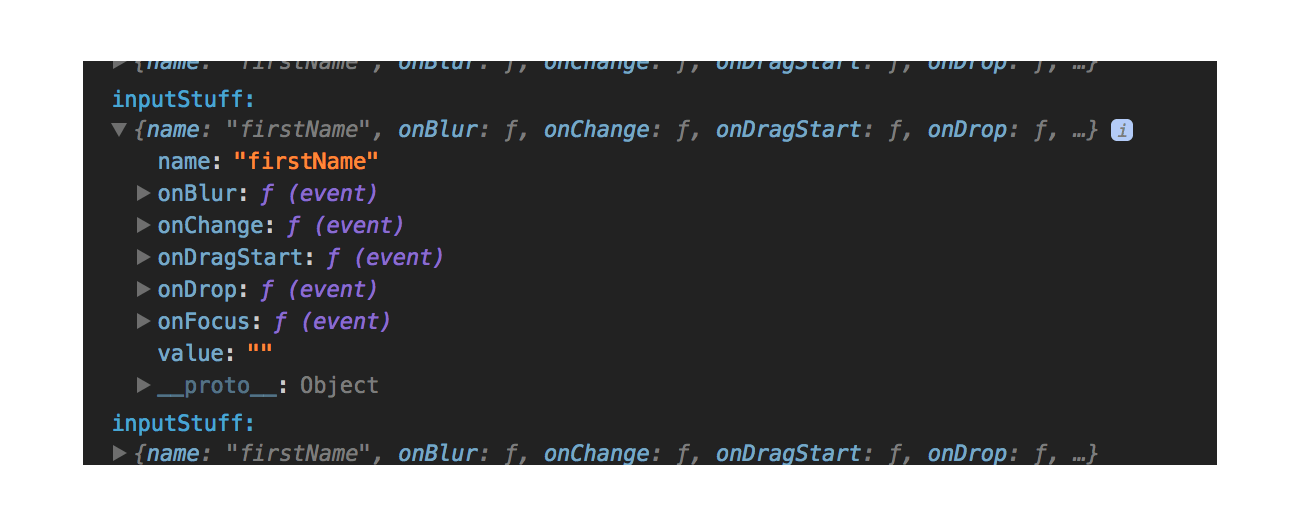
console.log("inputStuff: ", input);
return (
<div>
<div>{label}</div>
<div>
<input {...input} placeholder={label} type="text" />
</div>
</div>
);
};
export default Text;Notice how we spread props.input into our input field. The props passed by Field include a bunch of event handlers to handle clicks, changes, blurs, and other standard form field events, by accepting an event object and dispatching an action to change the state of the form in the form's reducer.
Of course, each of these methods can be further customized if you want to implement your own onClick, onChange, or whichever, maybe to hit an API endpoint before dispatching an action to Redux or filtering through some data and performing other side effects. For now, we'll keep it simple and stick with the default ones provided.
To use our new component, we just import it and feed it as a component prop on our Field:
form/form.component.js:
import React from "react";
import { Field } from "redux-form";
import Text from "../components/text";

export const FormComponent = ({ handleSubmit, onSubmit }) => {
  return (
    <div>
      <h1>My Very own Form</h1>
      <form onSubmit={handleSubmit(onSubmit)}>
        <Field name="firstName" label="First Name" component={Text} />
        <button type="submit">Submit</button>
      </form>
    </div>
  );
};

export default FormComponent;
Styling with Tachyons
As a quick aside, our forms look ugly right now. Yes, there is normal CSS, Sass, PostCSS, styled-components, and a plethora of other CSS tools we can use, but we'll be using tachyons for now. It's simple, expressive, responsive, and composable. I like to think of it like bootstrap but much lighter, but It's easier to show than explain.
First we need to import tachyons into our root component:
Index.js
import React from "react";
import ReactDOM from "react-dom";
import { Provider } from "react-redux";
import "tachyons";

import FormContainer from "./modules/form/form.container";
import configureStore from "./store";

const store = configureStore();

ReactDOM.render(
  <Provider store={store}>
    <FormContainer />
  </Provider>,
  document.getElementById("root"),
);
Then we start styling. 'm' stands for margin, 'w' for width, 'p' for padding, 'v' for vertical (top and bottom), 'a' for all (top, bottom, left, right), and the numbers are general sizes. Tachyons class names were made to be short but to resemble native CSS properties as close as possible.
src/modules/component/text.js
import React from "react";

export const Text = ({ label, input }) => {
  return (
    <div className="mv4 w-100">
      <div className="b sans-serif pv2 w-100">{label}</div>
      <input
        {...input}
        placeholder={label}
        type="text"
        className="pa2 ba b--black-40 w-100"
      />
    </div>
  );
};

export default Text;import React from "react";
import { Field } from "redux-form";
import Text from "../components/text";
export const FormComponent = ({ handleSubmit, onSubmit }) => {
return (
<div className="flex flex-column justify-center items-center">
<h1>My Very own Form</h1>
<form className="w-80" onSubmit={handleSubmit(onSubmit)}>
<Field name="firstName" label="First Named" component={Text} />
<button
type="submit"
className="link br2 bg-blue white dim pa3 f6 sans-serif b--blue ba"
>
Submit
</button>
</form>
</div>
);
};
export default FormComponent;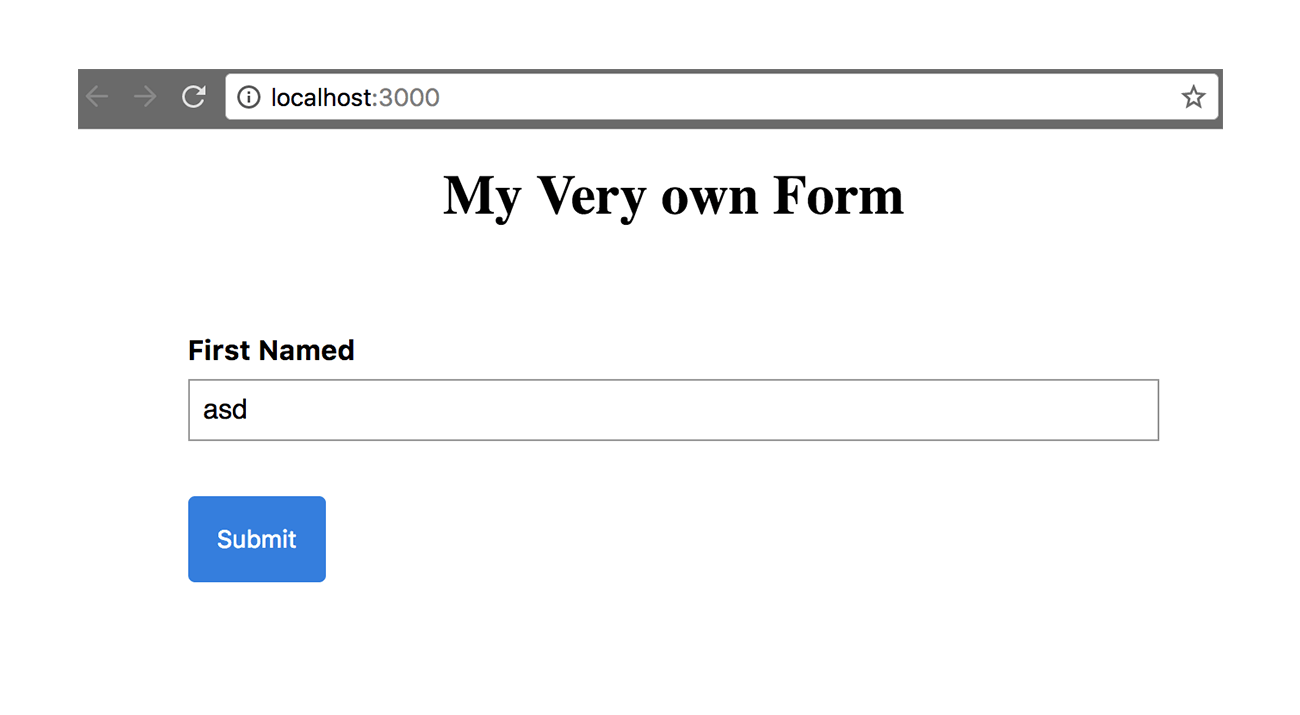
And now our form looks slightly better:
Let's just add a few more fields so that we have more to play with. We can reuse the text component we just made like this:
form/form.component.js:
import React from "react";
import { Field } from "redux-form";
import Text from "../components/text";

export const FormComponent = ({ handleSubmit, onSubmit }) => {
  return (
    <div className="flex flex-column justify-center items-center">
      <h1>My Very own Form</h1>
      <form className="w-80" onSubmit={handleSubmit(onSubmit)}>
        <Field name="firstName" label="First Named" component={Text} />
        <Field name="lastName" label="Last Name" component={Text} />
        <Field name="email" label="Email" component={Text} />
        <button
          type="submit"
          className="link br2 bg-blue white dim pa3 f6 sans-serif b--blue ba"
        >
          Submit
        </button>
      </form>
    </div>
  );
};

export default FormComponent;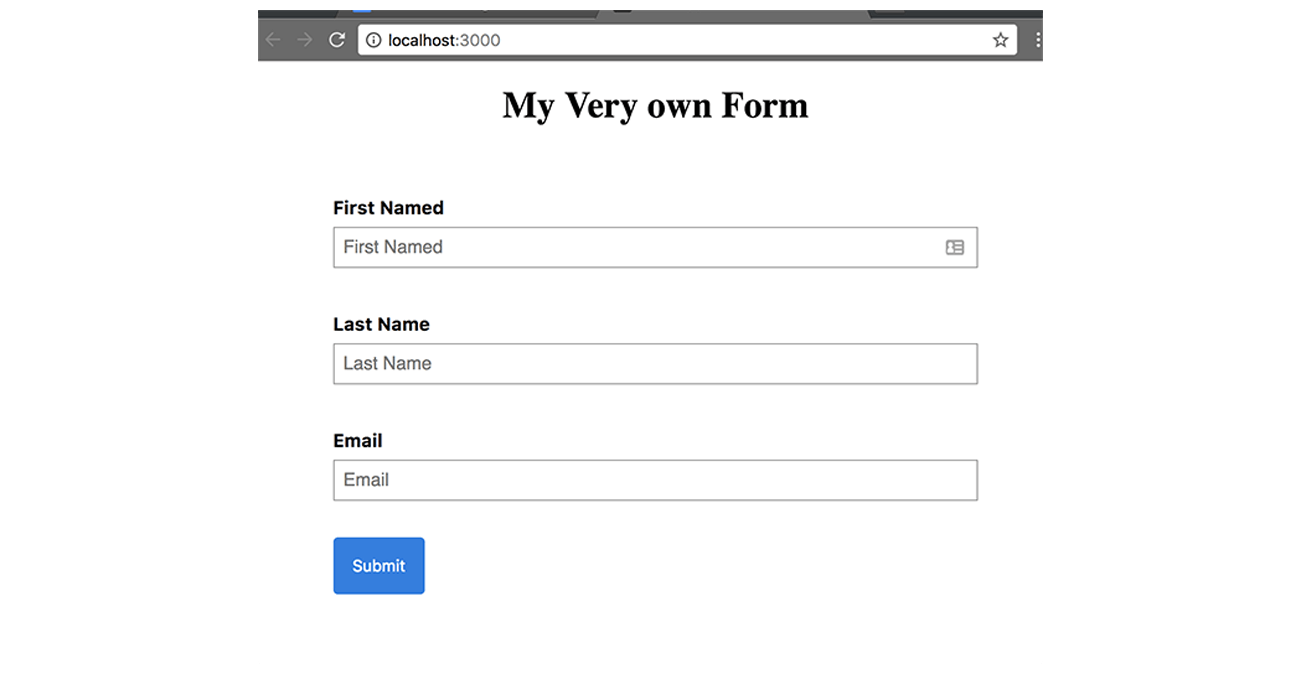
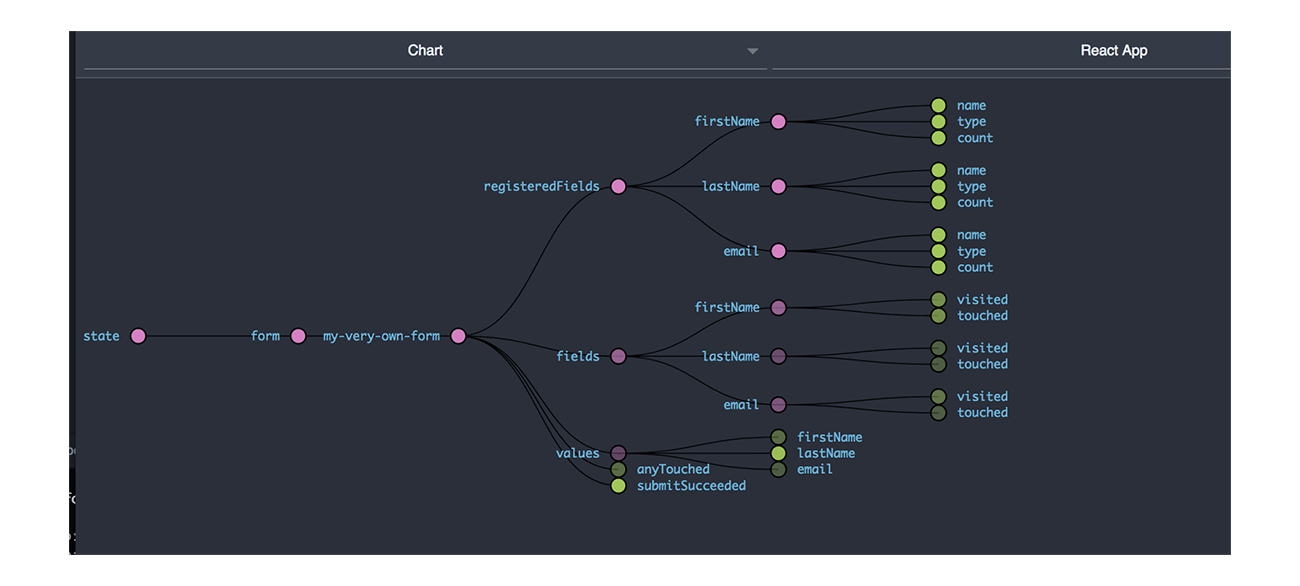
And they'll all be tracked in Redux State:
Forms can be tricky business without the right tools. We learned how Redux Form can help us manage the state of our form and fields with HOCs and components that provide useful action creators and connections to the store. In Part 2, we'll create more reusable and common form components, learn how to validate, and how we can further customize our forms with the tools Redux Form provides.
If you happen to have questions, feedback, feature requests or anything at all, please don't hesitate to reach out.